
A weak Wi-Fi signal can make everyday internet activities frustrating. You might experience slow downloads, buffering videos, interrupted video calls, or websites that take too long to load, especially in rooms far away from your wireless router. A TP-Link Wi-Fi extender can help solve this problem by expanding your existing wireless network’s coverage.
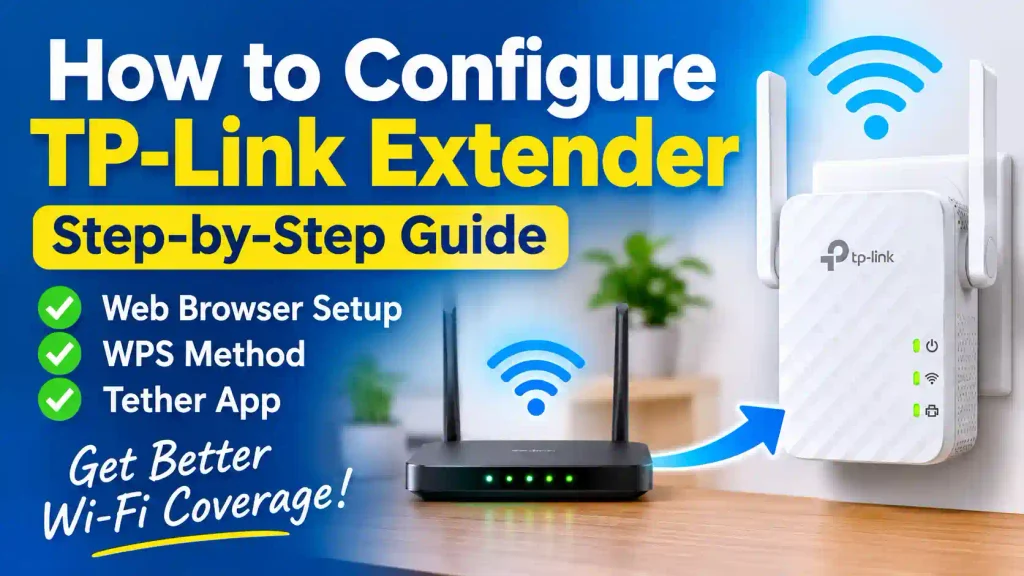
Configuring a TP-Link extender is usually straightforward. You can connect it to your existing router using the WPS button, configure it through a web browser, or use the TP-Link Tether mobile app on supported models.
In this guide, you’ll learn how to configure a TP-Link extender, connect it to your home Wi-Fi network, choose the right installation location, and fix common setup problems. Whether you’re using a Windows PC, Mac, Android phone, or iPhone, these instructions will help you get started.
Quick Answer: How to Configure a TP-Link Extender
To configure a TP-Link Wi-Fi extender, plug it into a power outlet near your router. Connect your computer or smartphone to the extender’s default Wi-Fi network, open a web browser, and visit http://tplinkrepeater.net or the management address printed on the device. Follow the setup wizard, select your existing Wi-Fi network, enter its password, and save the settings. Once configured, move the extender to a location between your router and the area with weak Wi-Fi coverage.
Alternatively, use the WPS buttons on your router and extender if both devices support WPS.
Table of Contents
- What Is a TP-Link Wi-Fi Extender?
- Things to Do Before Configuration
- How to Configure TP-Link Extender Using a Web Browser
- How to Configure TP-Link Extender Using WPS
- How to Configure TP-Link Extender Using the Tether App
- How to Connect Your Devices to the Extender
- Common TP-Link Extender Problems and Fixes
- Best Practices for Better Wi-Fi Coverage
- Frequently Asked Questions
- Conclusion
1. What Is a TP-Link Wi-Fi Extender?
A TP-Link Wi-Fi extender is a networking device designed to improve wireless coverage in areas where your existing router’s signal is weak.
It receives the wireless signal from your router and rebroadcasts it to nearby devices. This can help extend internet access to bedrooms, upstairs rooms, home offices, garages, and other areas that experience poor Wi-Fi reception.
For example, imagine your wireless router is installed in your living room, but your bedroom is located at the opposite end of your house. Your laptop or smartphone might receive a weak signal in that room. Installing a compatible TP-Link extender between the router and bedroom can help improve coverage.
However, remember that a Wi-Fi extender does not increase the internet speed provided by your internet service provider. Actual performance depends on your router, internet connection, extender model, wireless interference, and installation location.
2. Things to Do Before Configuring a TP-Link Extender
Before starting the configuration process, prepare the following items:
- TP-Link extender: Make sure your extender is compatible with your existing wireless router.
- Wi-Fi router: Your router should be working correctly and broadcasting a wireless network.
- Wi-Fi password: Keep your existing wireless network password ready.
- Computer or smartphone: You can use a Windows PC, Mac, Android device, or iPhone.
- Power outlet: Initially, plug the extender into an outlet near your router.
You should also check the model number printed on the extender. TP-Link has released several extender models, including RE200, RE220, RE305, RE315, RE450, and newer Wi-Fi 6 models.
The setup interface, default network name, available features, and supported configuration methods may differ between models.
If your extender has previously been configured, consider resetting it to factory defaults before starting a completely new setup.
To reset most TP-Link extenders:
- Plug the extender into a power outlet.
- Wait until it finishes starting up.
- Locate the RESET button or reset pinhole.
- Press and hold it for the period specified in your model’s manual.
- Release the button when the device’s LEDs indicate that it is resetting.
- Wait for the extender to restart.
A factory reset removes previously saved settings, so use this method only when necessary.
3. How to Configure TP-Link Extender Using a Web Browser
Using a web browser is one of the most reliable ways to configure a TP-Link Wi-Fi extender. This method is especially useful when you want to customize wireless settings or when your router does not support WPS.
Follow these steps.
Step 1: Plug In Your TP-Link Extender
First, plug your TP-Link extender into a power outlet close to your existing wireless router.
Wait until the power LED becomes stable. The exact LED behavior depends on your extender model.
Avoid placing the extender in its final location before completing the initial configuration. Keeping it near the router makes the first connection easier.
Step 2: Connect Your Computer or Smartphone to the Extender
Open the Wi-Fi settings on your computer or smartphone.
Look for the extender’s default wireless network name. Depending on the model, it may appear as:
- TP-Link_Extender
- TP-Link_Extender_2.4GHz
- TP-Link_Extender_5GHz
Select the appropriate network and connect to it.
Some models may require you to create a wireless connection without an internet connection at this stage. This is normal because the extender has not yet been linked to your router.
Step 3: Open the TP-Link Configuration Page
Open a web browser such as Google Chrome, Microsoft Edge, Firefox, or Safari.
Enter the following address in the browser’s address bar:
Press Enter.
If the address does not open, check the device label or user manual for the correct management address. Some models also support an IP address such as 192.168.0.254.
Make sure your computer or phone is connected directly to the extender’s network while opening the configuration page.
If the browser displays a connection error, check your connection and try again. You may also need to temporarily disable a VPN or disconnect from mobile data.
Step 4: Create an Administrator Password
On many newer TP-Link extenders, the initial setup wizard asks you to create a local administrator password.
Enter a strong password and confirm it.
This password is used to access the extender’s management interface. It may be different from your existing Wi-Fi password.
On some older models, the device may use a different initial login procedure. Follow the instructions displayed on your screen or in the product manual.
Step 5: Select Your Existing Wi-Fi Network
After logging in, the extender will scan for available wireless networks.
Wait for the scan to finish.
You should see a list of nearby Wi-Fi networks. Select your existing router’s network name (SSID).
If your router broadcasts separate 2.4 GHz and 5 GHz networks, choose the bands you want to extend, provided your extender supports them.
Click Next or the equivalent option to continue.
Step 6: Enter Your Wi-Fi Password
Enter the wireless password of your existing router.
Make sure the password is correct. Wi-Fi passwords are case-sensitive, so uppercase and lowercase letters must match.
If your router uses separate passwords for its 2.4 GHz and 5 GHz networks, enter the corresponding password for each band when requested.
Click Next to continue.
Step 7: Configure the Extended Network Name
The setup wizard may allow you to customize the extended network name.
Depending on your model, you may have options to:
- Use the same Wi-Fi name as your existing router.
- Add an extension suffix to the original network name.
- Create a separate network name for the extender.
For example, if your existing network is HomeWiFi, the extended network might appear as HomeWiFi_EXT.
Using the same name may make the network appear seamless, but automatic roaming between the router and extender depends on device and network support. A separate name makes it easier to identify which access point your device is connected to.
Choose your preferred option and continue.
Step 8: Save the Configuration
Review the settings displayed on the screen.
If everything is correct, click Save, Finish, or the equivalent option.
The extender may restart automatically to apply the new settings.
Wait until the wireless connection and signal indicators show that the extender has successfully connected to your router.
Congratulations! Your TP-Link extender is now configured.
4. How to Configure TP-Link Extender Using WPS
If your router and TP-Link extender both support Wi-Fi Protected Setup (WPS), you can connect them without entering the Wi-Fi password manually.
This is generally the quickest configuration method.
<PRIVATE_PERSON>### Step 1: Plug In the Extender
Plug your TP-Link extender into an electrical outlet near your router.
Wait for the power LED to become stable.
Step 2: Press the WPS Button on Your Router
Locate the WPS button on your wireless router.
Press it according to the router manufacturer’s instructions. On many routers, a short press activates WPS pairing mode.
Step 3: Press the WPS Button on the Extender
Within the pairing window specified by the router and extender, press the WPS button on your TP-Link extender.
The WPS or signal LED may start blinking while the devices establish a connection.
Step 4: Wait for the Connection
Allow the devices to complete the pairing process.
When the appropriate signal LED becomes stable, the extender should be connected to your router.
Step 5: Move the Extender to a Better Location
Unplug the extender and move it to a suitable outlet between your router and the area with weak Wi-Fi coverage.
Check the signal indicator after plugging it back in.
Important: WPS availability and LED behavior vary by model. Some routers have WPS disabled, and some network configurations do not support it. If pairing fails, use the web browser or Tether app method instead.
5. How to Configure TP-Link Extender Using the Tether App
TP-Link also offers the Tether mobile app for managing supported networking devices.
You can use it to configure compatible extenders using an Android phone or iPhone.
Follow these steps:
- Open Google Play Store or Apple App Store.
- Search for the official TP-Link Tether app.
- Download and install the application.
- Plug in your TP-Link extender near the router.
- Connect your smartphone to the extender’s default Wi-Fi network.
- Open the Tether app.
- Sign in or create an account if the app or device requires it.
- Select your extender from the available devices.
- Follow the on-screen instructions to connect it to your existing Wi-Fi network.
- Enter your router’s wireless password when requested.
- Complete the setup and wait for the extender to restart if necessary.
Once configuration is complete, you can use the app to manage supported settings and check your extender’s connection status.
Note: App features and setup availability vary by extender model and firmware version. Always download the official application and check device compatibility.
6. How to Connect Your Devices to the Extender
After configuring your TP-Link extender, connect your wireless devices to the extended network.
On a Windows 11 computer:
- Click the Wi-Fi icon in the taskbar.
- Open the available wireless networks.
- Select your extender’s network name.
- Click Connect.
- Enter the Wi-Fi password if requested.
- Wait until Windows confirms the connection.
If you configured the extender to use the same wireless network name and password as your router, your device may connect automatically.
You can follow a similar process on Android phones, iPhones, tablets, smart TVs, and other wireless devices.
For more Windows-related help, read our guide on How to Install Windows 11 on an Unsupported PC.
7. Common TP-Link Extender Problems and Fixes
Sometimes, your TP-Link extender may not configure correctly or may fail to connect to the router. Here are some common problems and their solutions.
Problem 1: tplinkrepeater.net Is Not Opening
Possible causes:
- Your computer is connected to the wrong Wi-Fi network.
- The extender is not fully powered on.
- The browser is using an incorrect address.
- A VPN or network configuration is interfering with access.
Solutions:
- Make sure your device is connected to the extender’s Wi-Fi network.
- Check the management address printed on the extender or in its manual.
- Try opening the address in another browser.
- Temporarily disconnect your VPN.
- Restart the extender and try again.
You can also try the extender’s management IP address if supported by your model.
Problem 2: TP-Link Extender Cannot Find the Router’s Wi-Fi Network
If the extender cannot detect your router’s wireless network, move it closer to the router.
Then perform another wireless scan.
Also check the following:
- Make sure your router’s Wi-Fi is enabled.
- Confirm that the network is not hidden.
- Check whether your extender supports the router’s wireless frequency and security settings.
- Restart the router and extender.
- Check for firmware updates if necessary.
Problem 3: Incorrect Wi-Fi Password Error
If the extender displays an incorrect password message, carefully re-enter your router’s Wi-Fi password.
Remember that wireless passwords are case-sensitive.
If you recently changed your router password, you may need to update the saved password in the extender’s configuration settings.
Problem 4: Extender Connected but No Internet Access
A successful connection between the extender and router does not always guarantee internet access.
Try these steps:
- Restart your router.
- Restart your TP-Link extender.
- Check whether the router itself has internet access.
- Verify the saved wireless password.
- Move the extender closer to the router.
- Reconfigure the extender if the problem continues.
If your router has no internet connection, contact your internet service provider.
Problem 5: Wi-Fi Signal Is Still Weak
An extender cannot provide a strong connection if it receives a very weak signal from the router.
Move the extender to a location where it can receive a stable wireless signal while still reaching the area where coverage is needed.
Avoid placing it behind large furniture, inside cabinets, near thick concrete walls, or close to devices that generate wireless interference.
8. Best Practices for Better Wi-Fi Coverage
Correct configuration is important, but extender placement also plays a major role in wireless performance.
Here are some practical tips:
1. Choose a Central Location
Place your extender approximately halfway between your router and the area with poor Wi-Fi coverage. Adjust the position based on its signal indicator and actual performance.
2. Avoid Physical Obstacles
Thick walls, metal objects, large appliances, and concrete structures can weaken wireless signals. Keep the extender in an open location whenever possible.
3. Use the Correct Frequency Band
The 2.4 GHz band generally offers better range, while 5 GHz can provide higher speeds over shorter distances. Select the appropriate band based on your home layout and device requirements.
4. Keep Your Firmware Updated
Check the TP-Link support website for firmware updates for your exact extender model and hardware version. Firmware updates can improve stability, security, and compatibility.
5. Secure Your Wireless Network
Use a strong Wi-Fi password and avoid sharing it with unauthorized users. Also, change the extender’s administrator password from any default credentials if applicable.
6. Test the Connection After Installation
Use a smartphone or laptop to check the Wi-Fi signal in the rooms where you previously experienced connection problems. Test internet browsing, video streaming, and downloads to confirm that performance has improved.
9. Frequently Asked Questions
1. How do I access my TP-Link extender settings?
Connect your computer or smartphone to the extender’s wireless network. Open a browser and visit http://tplinkrepeater.net. If the address does not work, check the extender’s label or manual for its correct management address.
2. What is the default password for a TP-Link extender?
There is no single universal default password for every TP-Link extender. Newer models commonly ask users to create an administrator password during initial setup. Check your model’s documentation for its specific login requirements.
3. Can I configure a TP-Link extender without WPS?
Yes. You can configure a TP-Link extender through its web management page or the TP-Link Tether app on supported models. Both methods allow you to connect the extender to your existing wireless router without using WPS.
4. Where should I place my TP-Link Wi-Fi extender?
Place your extender between your router and the area with weak wireless coverage. Choose a location where the extender can still receive a stable signal from the router. Avoid installing it in a dead zone.
5. Why is my TP-Link extender connected but the internet is not working?
This problem may occur because of an incorrect Wi-Fi password, weak router signal, router connectivity issues, or outdated settings. Restart both devices, verify the connection, and move the extender closer to the router if necessary.
10. Conclusion
Configuring a TP-Link Wi-Fi extender is a simple way to improve wireless coverage in your home or office. You can complete the setup through a web browser, use the WPS button, or configure a supported device through the TP-Link Tether app.
For most users, browser-based configuration provides the greatest control over the setup process. Once configuration is complete, place the extender in a location where it receives a good signal from the router and can reach the areas where you need better coverage.
If you experience setup problems, check your Wi-Fi password, confirm device compatibility, restart your networking equipment, and follow the troubleshooting steps explained in this guide.
With the correct configuration and placement, your TP-Link extender can help provide a more reliable wireless connection throughout your home or workplace.