
Finding your motherboard model in Windows 11 is useful when you need to download the correct drivers, update your BIOS, upgrade your processor, or check hardware compatibility. However, Windows does not always display the motherboard information in an obvious location, especially on custom-built desktop computers.
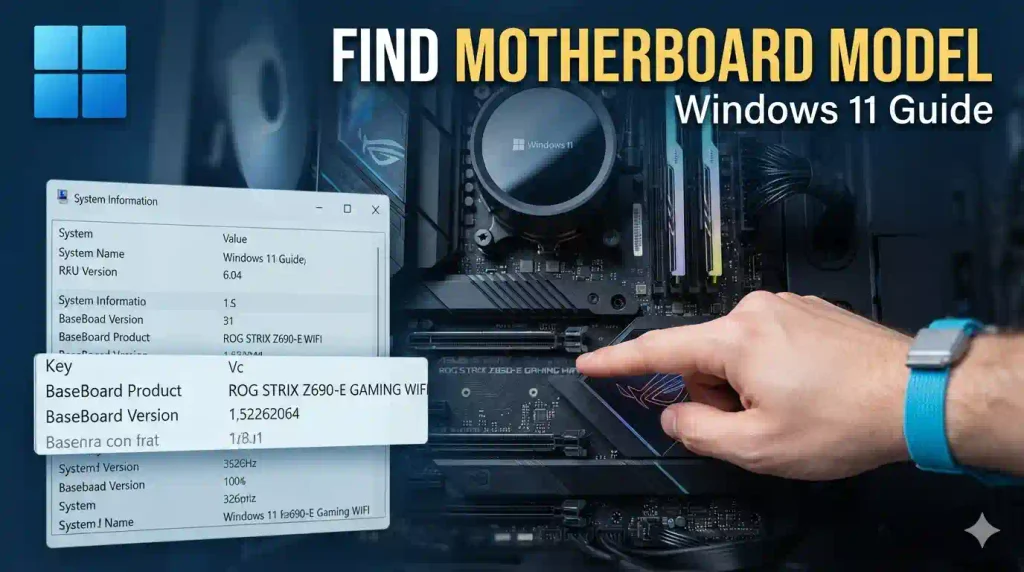
The good news is that you usually do not need to open your computer case to identify your motherboard. Windows 11 includes built-in tools that can reveal the manufacturer, product name, and sometimes the board version. You can also use PowerShell, third-party system information software, or the manufacturer’s support website.
In this guide, you’ll learn six practical ways to find your motherboard model in Windows 11, how to interpret the results, and what to do when Windows displays “To Be Filled By O.E.M.” or another incomplete hardware description.
Whether you’re troubleshooting a PC, preparing for a hardware upgrade, or downloading motherboard drivers, these methods will help you identify the correct hardware.
Quick Answer: How to Find Your Motherboard Model in Windows 11
The fastest way to find your motherboard model in Windows 11 is to use System Information or Command Prompt.
Using System Information:
- Press Windows + R to open the Run dialog.
- Type
msinfo32and press Enter. - Find BaseBoard Manufacturer, BaseBoard Product, and BaseBoard Version if those entries are available in your system’s report.
Alternatively, open Command Prompt and run:
wmic baseboard get product,manufacturer,version,serialnumberOn Windows installations where the WMIC utility is unavailable, use PowerShell instead:
Get-CimInstance Win32_BaseBoard | Select-Object Manufacturer, Product, Version, SerialNumberThese commands query motherboard information reported by Windows. If the results are incomplete or inaccurate, check your computer manufacturer’s support page or inspect the physical motherboard.
Table of Contents
- What Is a Motherboard Model?
- Method 1: Use System Information
- Method 2: Use Command Prompt
- Method 3: Use Windows PowerShell
- Method 4: Check the BIOS or UEFI
- Method 5: Use Third-Party System Information Software
- Method 6: Check the Physical Motherboard
- Common Errors and Fixes
- Best Practices and Pro Tips
- Frequently Asked Questions
- Conclusion
What Is a Motherboard Model?
A motherboard is the main circuit board that connects your processor, memory, storage devices, graphics card, and other computer components. Its model identifies the specific board design and helps you determine which hardware and software are compatible with your system.
For example, a motherboard may have a manufacturer such as ASUS, MSI, Gigabyte, ASRock, or Dell, along with a specific product name or model number.
When identifying your motherboard, you may encounter three important fields:
- Manufacturer: The company that produced the motherboard or the system board.
- Product or Model: The specific motherboard model, which helps identify supported processors, memory, expansion slots, and firmware.
- Version: A hardware revision or board version, when the manufacturer reports one.
These details are especially important when downloading BIOS updates. Two motherboards with similar names may have different revisions or firmware requirements.
If you are troubleshooting other Windows 11 hardware issues, you may also find our guide on fixing a mouse that is not working on a laptop useful.
Method 1: Find Your Motherboard Model Using System Information
System Information is one of the easiest built-in Windows tools for identifying motherboard details. It provides a report of your computer’s hardware resources, system components, and software environment.
Steps to Follow
Step 1: Open the Run dialog
Press Windows + R on your keyboard.
Step 2: Launch System Information
Type the following command:
msinfo32Press Enter or select OK.
Step 3: Locate the motherboard information
In the System Information window, select System Summary from the left panel.
Look through the system details for entries such as:
- BaseBoard Manufacturer
- BaseBoard Product
- BaseBoard Version
Depending on your computer, these fields may appear alongside the BIOS version, processor, installed memory, and system manufacturer.
Step 4: Record the details
Write down the manufacturer and product name. If a board version is displayed, record that too.
You can use this information to search the manufacturer’s official website for compatible drivers, specifications, and BIOS updates.
What If the BaseBoard Fields Are Missing?
Some manufacturers do not populate every motherboard field correctly. You might see a generic value, an empty field, or an OEM placeholder.
If this happens, try the Command Prompt or PowerShell method below. For branded laptops and prebuilt desktops, the computer’s exact model number may provide more useful information than the motherboard fields alone.
Best for: Beginners who want to identify motherboard details without installing additional software.
Method 2: Find the Motherboard Model Using Command Prompt
Command Prompt provides another way to retrieve motherboard information. It is useful when you prefer a command-line tool or want to capture the output for troubleshooting.
Steps to Follow
Step 1: Open Command Prompt
Press the Windows key, type cmd, and open Command Prompt.
Administrator access is generally unnecessary for this read-only query.
Step 2: Run the motherboard command
Enter:
wmic baseboard get product,manufacturer,version,serialnumberPress Enter.
Step 3: Read the results
If WMIC is available, the output may include the following fields:
| Field | Information |
|---|---|
| Manufacturer | Motherboard manufacturer |
| Product | Motherboard model or product name |
| Version | Reported board version |
| SerialNumber | Reported motherboard serial number |
For example, the output might identify a manufacturer and a product code. Use the actual values displayed on your computer rather than relying on an example model.
Important: WMIC is deprecated, and the command-line utility may not be installed or available on some Windows 11 systems. If Windows reports that wmic is not recognized, use PowerShell instead.
Best for: Users who want a quick command-line lookup on systems where WMIC is available.
Method 3: Find Your Motherboard Model Using Windows PowerShell
PowerShell is a reliable alternative when the older WMIC utility is missing. It uses Windows management infrastructure to retrieve motherboard information.
Steps to Follow
Step 1: Open PowerShell
Right-click Start and select Terminal or Terminal (Admin). You can also search for Windows PowerShell from the Start menu.
For this query, a regular terminal session is normally sufficient.
Step 2: Run the command
Enter the following PowerShell command:
Get-CimInstance Win32_BaseBoard | Select-Object Manufacturer, Product, Version, SerialNumberPress Enter.
Step 3: Review the motherboard details
PowerShell displays the properties returned by Windows for the motherboard.
For example, the output may contain a manufacturer name, a product identifier, and a version value.
If you only want to display the motherboard manufacturer and model, use:
Get-CimInstance Win32_BaseBoard | Select-Object Manufacturer, ProductThis shorter command is useful when you only need the basic identification details.
Why Use PowerShell Instead of WMIC?
PowerShell uses the CIM cmdlets supported by modern Windows versions, while WMIC is a deprecated command-line utility.
The PowerShell method is particularly useful for Windows 11 troubleshooting, IT support, and system inventory tasks.
Keep in mind that PowerShell retrieves the information reported by the system firmware and hardware management interfaces. It cannot guarantee that an OEM has populated every field accurately.
Best for: IT professionals, system administrators, and users whose Windows 11 installation does not recognize WMIC.
Method 4: Check the BIOS or UEFI Firmware
If Windows cannot identify your motherboard correctly, check your computer’s BIOS or UEFI firmware interface.
This method is useful when the motherboard information is missing from System Information and command-line tools.
Steps to Follow
Step 1: Open Windows Settings
Press Windows + I to open Settings.
Step 2: Navigate to Advanced Startup
Go to:
System > Recovery > Advanced startup
Select Restart now and confirm if prompted. Save your work before restarting.
Step 3: Open the firmware settings
After the computer restarts, select:
Troubleshoot > Advanced options > UEFI Firmware Settings > Restart
The exact options can vary by computer. Some systems do not expose a UEFI Firmware Settings option through this menu.
Step 4: Find the hardware information
Once the firmware interface opens, look for sections such as Main, System Information, Product Information, or Board Information.
The available labels and details depend on the motherboard manufacturer.
Step 5: Exit without changing settings
Record the motherboard or system model, then exit the firmware interface. Avoid changing BIOS settings unless you understand their purpose.
What If You Cannot Find the Motherboard Model in BIOS?
Some BIOS interfaces show only the computer model, BIOS version, and processor details. In that case, use the manufacturer’s support page or inspect the motherboard itself.
Best for: Users whose Windows tools return incomplete or generic motherboard information.
Method 5: Use Third-Party System Information Software
Third-party system information utilities can make hardware identification easier by presenting component details in a single interface.
Examples include CPU-Z and HWiNFO. Download these utilities only from their official websites, and avoid unnecessary bundled installers or unofficial download mirrors.
Option A: CPU-Z
CPU-Z is a hardware information utility that can display details about your motherboard, processor, memory, and other system components.
To check your motherboard:
- Download CPU-Z from its official website.
- Install and launch the application.
- Open the Mainboard tab.
- Review the manufacturer, model, chipset, and BIOS information where available.
The exact fields shown depend on the system and the utility version.
Official website: https://www.cpuid.com/softwares/cpu-z.html
Option B: HWiNFO
HWiNFO provides a more extensive hardware report and can help identify system components when basic Windows tools are insufficient.
To use it:
- Download HWiNFO from its official website.
- Launch the application.
- Open the system summary or motherboard-related sections.
- Look for the motherboard manufacturer, model, and firmware details.
Official website: https://www.hwinfo.com/
Are Third-Party Tools Necessary?
No. System Information and PowerShell are usually enough for a basic motherboard lookup. Third-party utilities are most useful when you also want chipset, memory, BIOS, or other hardware details.
Best for: Users who want a more detailed hardware report or need to investigate an unfamiliar PC.
Method 6: Check the Physical Motherboard
If software tools cannot identify your motherboard, inspect the hardware directly. This is often the most reliable option for custom-built desktop computers.
Steps to Follow
Step 1: Shut down the computer
Save your work, shut down Windows, and disconnect the computer from its power source.
Step 2: Take basic safety precautions
For a desktop PC, disconnect the power cable and peripherals. Avoid working on internal components while the computer is connected to power. Protect the components from static electricity and handle the board carefully.
If you are uncomfortable opening the case, ask a qualified technician for assistance.
Step 3: Open the case
Follow your computer manufacturer’s instructions for removing the side panel. Laptop disassembly is more complicated, and opening a laptop may affect its warranty or damage delicate components.
Step 4: Look for the printed model name
On desktop motherboards, the model name or product code may be printed near the memory slots, processor socket, PCIe slots, or board edges.
For example, the board may display a manufacturer’s name and a model identifier.
Step 5: Check the revision number
Some manufacturers print a board revision near the model name, often in a format such as REV: 1.0.
Record the complete model and revision information before searching for drivers or firmware.
What About Laptops and Branded Desktop Computers?
Laptops and OEM desktops may use custom motherboards identified by a manufacturer part number rather than a familiar retail motherboard name.
In these cases, find the computer’s model or service tag on its label, in BIOS, or through the manufacturer’s support utility. Use the official support website to identify the correct system board and available downloads.
Best for: Custom-built PCs, unidentified motherboards, and systems that report generic or incorrect information in Windows.
Common Errors and Fixes
Even though motherboard identification is usually straightforward, Windows 11 may return incomplete results. The following fixes can help.
1. WMIC Is Not Recognized
Error: Windows reports that wmic is not recognized as a command.
Fix: Use PowerShell instead:
Get-CimInstance Win32_BaseBoard | Select-Object Manufacturer, Product, VersionWMIC is deprecated, so its absence does not necessarily indicate a Windows problem.
2. The Motherboard Model Shows “To Be Filled By O.E.M.”
This message generally indicates that the manufacturer or firmware has not supplied a meaningful value for that field.
Fix:
- Run the PowerShell command to check the available motherboard data.
- Look for the computer model in System Information.
- Check the OEM support page using the exact computer model or service tag.
- Inspect the motherboard’s printed identification if necessary.
A generic description does not automatically mean that the motherboard is defective.
3. The Manufacturer or Product Field Is Blank
Some firmware implementations do not report every field.
Fix: Check the BIOS or UEFI interface, use a system information utility, or identify the computer through its manufacturer’s support page.
4. Windows Shows the Computer Model Instead of the Motherboard Model
This is common on laptops and branded desktop computers. The system manufacturer may report the complete computer model while hiding the specific motherboard’s retail identity.
Fix: Search the official support website using the computer model or service tag. Do not assume that the system model and motherboard model are interchangeable.
5. You Find Several Similar Motherboard Models
Manufacturers sometimes sell boards with nearly identical names but different revisions, chipsets, or firmware.
Fix: Verify the complete model identifier, board revision, and system specifications. Check the official compatibility list before downloading BIOS updates or purchasing replacement hardware.
Best Practices and Pro Tips
Follow these recommendations after identifying your motherboard.
Verify the Model Before Updating BIOS
A BIOS update intended for another motherboard model or revision can cause serious startup problems. Download firmware only from the manufacturer’s official support page and follow its instructions.
Check CPU and RAM Compatibility
Before upgrading your processor or memory, consult the exact motherboard specifications. Processor support may depend on the BIOS version, and memory compatibility can depend on capacity, speed, and module configuration.
Prefer Official Driver Downloads
Use the motherboard manufacturer’s support page or the computer manufacturer’s support page for drivers. Avoid driver websites that cannot establish the origin of their files.
Record Your Hardware Information
Keep a note of the motherboard model, board revision, BIOS version, and computer model. This information can save time during future troubleshooting or upgrades.
Protect Your Computer During Troubleshooting
If you are also resolving Windows 11 usability issues, consider these related guides:
These tutorials cover separate Windows features and can help you configure your system after completing your hardware checks.
Frequently Asked Questions (FAQs)
1. How do I find my motherboard model in Windows 11 without opening my PC?
Press Windows + R, type msinfo32, and press Enter. Check the BaseBoard Manufacturer and BaseBoard Product entries under System Summary. You can also use the PowerShell Get-CimInstance Win32_BaseBoard command.
2. What is the fastest command to check my motherboard model?
Use this PowerShell command:
Get-CimInstance Win32_BaseBoard | Select-Object Manufacturer, ProductIt displays the motherboard manufacturer and product name reported by Windows.
3. Why does Windows 11 show “To Be Filled By O.E.M.”?
This usually means that the motherboard’s firmware or manufacturer has not populated the relevant identification field. Check the computer manufacturer’s support website, BIOS information, or the physical motherboard label to identify the correct model.
4. Can I find my motherboard model without installing software?
Yes. Windows 11 includes System Information, Command Prompt on systems with WMIC available, and PowerShell. You can also check the BIOS or UEFI firmware interface. Third-party utilities are optional.
5. Do I need my motherboard model to update BIOS?
Yes, you should identify the exact motherboard or computer model before updating BIOS. Confirm the correct hardware revision and follow the manufacturer’s firmware instructions. Installing an incompatible BIOS can prevent the computer from starting correctly.
Conclusion
Finding your motherboard model in Windows 11 does not have to be complicated. Start with System Information by running msinfo32, or use PowerShell if you prefer a direct command-line result.
If Windows displays incomplete information, check your BIOS or UEFI firmware, use a reputable system information utility, or inspect the physical motherboard. For laptops and branded desktops, the manufacturer’s support page may provide the most accurate identification.
Once you have verified the model and revision, you can make more informed decisions about drivers, BIOS updates, processor upgrades, and memory compatibility. Always confirm the exact hardware details before making firmware or hardware changes.