
If you have moved to another country, relocated for work, or want to access apps and services available in a different region, you may need to change your Apple ID country or region. Apple allows users to update their account’s country or region through an iPhone, iPad, Mac, Windows PC, or web browser.
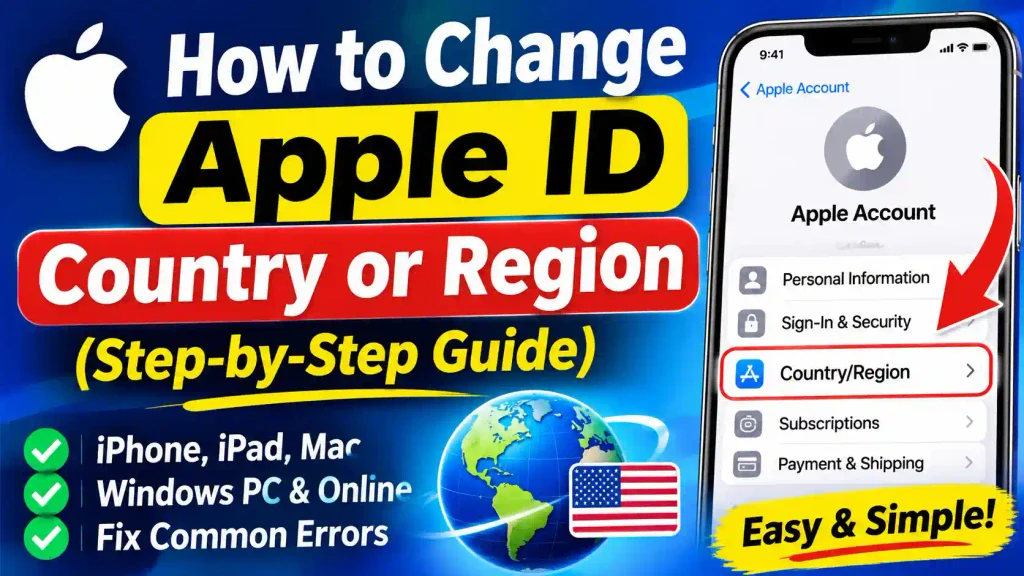
However, changing your Apple ID country is not always as simple as selecting a new location. Apple has certain requirements regarding account balance, active subscriptions, payment methods, and Family Sharing.
In this guide, you’ll learn how to change your Apple ID country or region using different devices. We’ll also explain what you should do before making the change, common problems you might encounter, and how to fix them.
Whether you’re switching from the United States to another country or moving to the US, follow the instructions below to update your Apple Account successfully.
Quick Answer: How to Change Apple ID Country
To change your Apple ID country or region on an iPhone:
- Open the Settings app.
- Tap your name at the top.
- Select Media & Purchases.
- Tap Country/Region.
- Select Change Country or Region if prompted.
- Choose your new country.
- Review and agree to Apple’s Terms and Conditions.
- Enter a valid payment method and billing address for your new country, if required.
- Tap Done to save the changes.
Your Apple Account’s country or region will be updated after the process is completed.
Table of Contents
- What Happens When You Change Your Apple ID Country?
- Things to Do Before Changing Your Country
- How to Change Apple ID Country on iPhone or iPad
- How to Change Apple ID Country on Mac
- How to Change Apple ID Country on Windows PC
- How to Change Apple ID Country Online
- Common Problems and Their Fixes
- Best Practices and Tips
- Frequently Asked Questions
1. What Happens When You Change Your Apple ID Country?
Your Apple ID, now officially called your Apple Account, connects you to Apple’s services, including the App Store, Apple Music, Apple TV, iCloud, and other digital services.
Changing your country or region updates the storefront associated with your account.
Here are some important changes you should understand:
App Store Availability: Some applications available in your previous country might not be available in your new region. Similarly, new apps may become available after changing your location.
Subscription Pricing: Apple Music, iCloud+, and other subscriptions may have different prices depending on your selected country.
Payment Methods: You may need a payment method supported in your new country.
Regional Content: Movies, music, books, and other digital content may differ between countries.
Billing Information: Your billing address must generally match the requirements of the selected country and payment method.
Changing your Apple Account country does not automatically move your physical location or change your device’s language, time zone, or GPS settings.
2. Things to Do Before Changing Your Apple ID Country
Before changing your Apple Account country, take a few minutes to prepare. Apple has certain restrictions that can prevent you from completing the process.
Here are the important things to check.
Spend Your Remaining Apple Account Balance
If you have money remaining in your Apple Account balance, spend it before changing your country or region.
For example, if your current account has an unused App Store balance, you may need to use it before proceeding.
If your remaining balance is too small to purchase anything, contact Apple Support for assistance.
Cancel Active Subscriptions
Some subscriptions can prevent you from changing your country or region.
Check your active subscriptions and cancel those that block the change. You may also need to wait until the current subscription period ends.
Remember that canceling a subscription does not necessarily mean it stops immediately.
Complete Pending Purchases and Refunds
Make sure there are no pending transactions associated with your account.
Check for:
- Pending App Store purchases.
- Movie rentals.
- Pre-orders.
- Season Passes.
- Pending store credit refunds.
- Other active memberships.
Wait until these activities are completed before trying again.
Check Your Family Sharing Status
If you’re part of an Apple Family Sharing group, you might not be able to change your country or region.
You may need to leave the Family Sharing group before proceeding.
Prepare a Valid Payment Method
Apple may require a payment method accepted in your new country.
Depending on your location, supported methods may include credit cards, debit cards, or other locally available payment options.
Make sure your billing address and payment information are accurate.
Pro Tip: Download important apps, music, movies, and books before changing your region. Some previously purchased content may not be available for redownload in your new country.
3. How to Change Apple ID Country on iPhone or iPad
The easiest way to change your Apple Account country is through the Settings app.
Follow these steps:
Step 1: Open Settings
Unlock your iPhone or iPad and open the Settings application.
Step 2: Tap Your Apple Account Name
At the top of the Settings screen, tap your name or Apple Account profile.
Step 3: Open Media & Purchases
Scroll down and select Media & Purchases.
If prompted, sign in using your Apple Account credentials.
Step 4: Select Country/Region
Tap the Country/Region option.
You will see your currently selected country or region.
Step 5: Choose Your New Country
Tap the option to change your country or region, if displayed.
Select the country you want to switch to from the available list.
Step 6: Review Apple’s Terms and Conditions
Apple will display the Terms and Conditions for your selected country.
Read the information and tap Agree to continue.
Step 7: Enter Payment Information
Select an accepted payment method and enter the required payment details and billing address.
Make sure the information matches your new country’s payment requirements.
Step 8: Save Your Changes
Tap Done to complete the process.
Your Apple Account country or region should now reflect the new selection.
4. How to Change Apple ID Country on Mac
If you use a MacBook, iMac, or Mac mini, you can also change your Apple Account country through the Apple Music or Apple TV application.
Follow these instructions:
- Open the Apple Music or Apple TV app on your Mac.
- Click Account in the menu bar.
- Select Account Settings.
- Sign in to your Apple Account if requested.
- Find the Country/Region section.
- Click the option to change your country or region.
- Select your preferred country.
- Review Apple’s Terms and Conditions and click Agree.
- Enter your new payment information and billing address if required.
- Click Done to save the changes.
Once completed, your Apple Account will use the selected country’s storefront.
5. How to Change Apple ID Country on Windows PC
Windows users can change their Apple Account country using Apple’s Apple Music or Apple TV application.
You don’t need an iPhone or Mac to complete this process.
Follow these steps:
Step 1: Open Apple Music or Apple TV
Launch the Apple Music or Apple TV application on your Windows computer.
Step 2: Sign In to Your Account
Click your name at the bottom of the sidebar.
If you aren’t signed in, select Sign In and enter your Apple Account credentials.
Step 3: Open Account Settings
Click View My Account.
You may need to authenticate your account again.
Step 4: Select Change Country or Region
Find the Change Country or Region option on the Account Information page.
Click it to continue.
Step 5: Choose Your New Country
Select the country or region you want to use.
Step 6: Accept the Terms and Conditions
Review Apple’s Terms and Conditions and click Agree.
Step 7: Update Payment Information
Enter a valid payment method and billing address for your selected country, if required.
Click Continue to complete the process.
Your Apple Account country should now be updated.
6. How to Change Apple ID Country Online
If you don’t have access to an Apple device or prefer using a browser, you can also update your country through Apple’s official website.
Here’s how:
- Open a web browser on your computer or smartphone.
- Visit https://account.apple.com.
- Sign in using your Apple Account email address and password.
- Complete any requested verification.
- Open Personal Information.
- Select Country/Region.
- Follow the on-screen instructions.
- Provide any required information to complete the update.
This method is useful when you want to manage your Apple Account directly from a web browser.
7. Common Problems When Changing Apple ID Country and How to Fix Them
Sometimes, Apple may prevent you from changing your country or region. This usually happens because of account restrictions, payment problems, or unfinished transactions.
Here are some common issues and their solutions.
Problem 1: Cannot Change Country or Region
Possible Cause: Your account may have an active subscription, remaining balance, or pending transaction.
Solution:
- Check your Apple Account balance.
- Cancel subscriptions that block the change.
- Wait for pending transactions to finish.
- Try changing your country again.
Problem 2: Payment Method Is Not Accepted
Possible Cause: Your payment method may not be supported in the selected country, or the billing information may be incorrect.
Solution:
- Use a payment method accepted in your new country.
- Verify your billing address.
- Check that your card details are correct.
- Contact your bank if the payment method requires additional verification.
Problem 3: Country/Region Option Is Unavailable
Possible Cause: Your account may be restricted by Family Sharing or another account-related requirement.
Solution:
Check whether you’re part of a Family Sharing group. If necessary, leave the group according to Apple’s instructions and try again.
Problem 4: Active Subscription Prevents the Change
Possible Cause: Certain subscriptions are still active.
Solution:
Open Settings, tap your name, and select Subscriptions.
Review your active subscriptions and cancel those that prevent the country change. Wait until the relevant subscription period ends before trying again.
Problem 5: Apple Account Balance Is Remaining
Possible Cause: You still have store credit in your account.
Solution:
Spend the remaining balance before switching countries.
If the remaining amount is too small to purchase an item, contact Apple Support to find out how to clear it.
8. Best Practices and Tips Before Changing Your Apple ID Country
Changing your Apple Account country can affect your digital purchases and subscriptions. Follow these tips to avoid unnecessary problems.
1. Back Up Important Information
Keep a current backup of your important device data before making significant account changes.
2. Download Important Content
Download apps, books, music, and other content you may need later. Availability can vary by region.
3. Verify Your Payment Details
Use accurate payment information and a billing address that meets your new country’s requirements.
4. Check Subscription Availability
Not every Apple subscription or third-party service is available in every country. Check availability before making the switch.
5. Use Apple’s Official Website
Avoid third-party websites claiming they can change your Apple Account region instantly. Use Apple’s official Settings options or https://account.apple.com.
6. Keep Your Account Secure
Never share your Apple Account password or verification codes with anyone claiming to provide region-changing services.
7. Contact Apple Support When Necessary
If your account balance, Family Sharing status, or payment restrictions prevent the change, contact Apple Support rather than trying unofficial workarounds.
Conclusion
Changing your Apple ID country or region is a straightforward process when your account meets Apple’s requirements.
You can update your country using an iPhone, iPad, Mac, Windows PC, or the official Apple Account website.
Before making the change, remember to spend your remaining account balance, cancel subscriptions that block the process, complete pending transactions, and prepare an accepted payment method.
Following the instructions in this guide should help you change your Apple Account country without unnecessary complications.
For additional technology tutorials and troubleshooting guides, explore more articles on Multicare Technical.
Frequently Asked Questions (FAQs)
1. Can I change my Apple ID country without a payment method?
In some situations, Apple may allow you to proceed without entering a payment method. However, you may be required to provide a valid payment method for your new country. Apple’s guidance also says that if you don’t want to enter a payment method, you can wait until you’re physically in your new country and create a new Apple Account.
2. Will I lose my apps if I change my Apple ID country?
Changing your country does not automatically delete all your downloaded apps. However, some apps and digital content may not be available in your new region. You may also have difficulty redownloading certain purchases if they are no longer available.
3. How many times can I change my Apple ID country?
Apple’s published country-change instructions do not specify a universal fixed number of country changes. However, account requirements and restrictions may affect when you can make another change.
4. Can I change my Apple ID country while having active subscriptions?
Some active subscriptions can prevent you from changing your country or region. You may need to cancel the relevant subscriptions and wait until their current billing periods end before proceeding.
5. Does changing my Apple ID country affect iCloud data?
Changing your Apple Account country does not automatically delete your iCloud data. However, subscription availability, pricing, and storage-plan options may change. Check your iCloud+ subscription and storage requirements before switching regions.