
Windows Fax and Scan is a built-in Windows utility that allows users to scan documents, save images, and send or receive faxes using compatible hardware. It is particularly useful for office workers, IT professionals, and businesses that regularly handle printed documents.
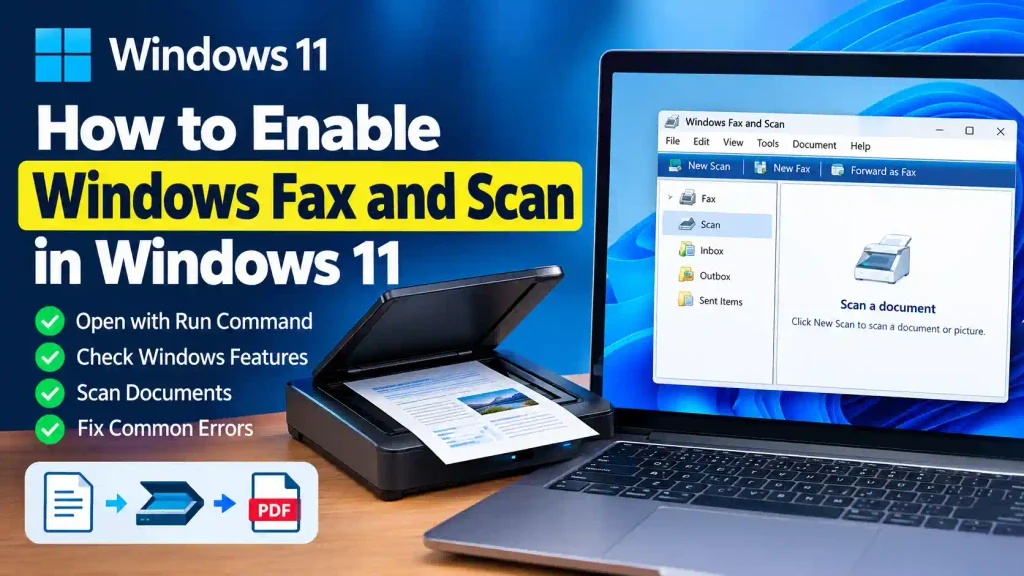
However, Windows Fax and Scan may not appear on some Windows 11 computers because Microsoft no longer includes it by default in newer Windows 11 installations. Fortunately, you can still install it as an optional Windows feature.
If you cannot find Windows Fax and Scan on your computer, there is no need to download third-party software. You can enable it using a simple PowerShell command or install it through the Windows Settings application.
In this guide, we will explain two working methods to enable Windows Fax and Scan in Windows 11, starting with the PowerShell method.
Quick Answer: How to Enable Windows Fax and Scan in Windows 11
To enable Windows Fax and Scan using PowerShell:
- Right-click the Start button and select Terminal (Admin).
- Select the PowerShell tab if necessary.
- Copy and paste the following command:
Add-WindowsCapability -Online -Name "Print.Fax.Scan~~~~0.0.1.0"- Press Enter and wait for Windows to install the feature.
- Restart your computer if required.
- Open Start, search for Windows Fax and Scan, and launch the application.
Alternatively, you can install it through Settings > System > Optional features > View features.
Table of Contents
- What Is Windows Fax and Scan?
- Why Is Windows Fax and Scan Missing in Windows 11?
- Method 1: Enable Windows Fax and Scan Using PowerShell
- Method 2: Enable Windows Fax and Scan Using Settings
- How to Open Windows Fax and Scan
- Common Errors and Their Fixes
- Best Practices and Pro Tips
- Frequently Asked Questions
- Conclusion
1. What Is Windows Fax and Scan?
Windows Fax and Scan is a Microsoft utility designed to help users manage scanning and faxing tasks directly from their Windows computers.
It provides a straightforward interface for scanning paper documents, saving scanned files, and managing fax-related operations.
Some of its useful features include:
- Document scanning: Scan paper documents and save them digitally.
- Image scanning: Scan photographs and other printed images.
- File management: Save scanned documents in supported image formats.
- Fax management: Send and receive faxes using compatible fax hardware and services.
- Multiple scanning options: Configure scanning preferences based on the connected scanner.
The application is particularly useful for users who prefer a traditional Windows scanning interface rather than installing additional scanning applications.
Important: Installing Windows Fax and Scan does not automatically install your scanner’s hardware drivers or provide a fax telephone connection. You need compatible hardware and the appropriate drivers to use those functions.
2. Why Is Windows Fax and Scan Missing in Windows 11?
If you recently installed Windows 11 or upgraded your computer, you might notice that Windows Fax and Scan is missing from the Start menu.
This is generally because Microsoft distributes the application as a Feature on Demand rather than including it by default in newer Windows 11 installations.
Microsoft identifies this feature as:
Capability Name: Print.Fax.Scan~~~~0.0.1.0
It is available as a Windows Feature on Demand, which means you can install it when needed.
Other possible reasons include:
- A fresh Windows 11 installation does not include the feature.
- Windows optional features have not been installed.
- Windows Update cannot download the required installation files.
- Your computer is managed by organizational update policies.
- The Windows component store has installation-related problems.
You can resolve the missing application issue using either of the following methods.
3. Method 1: Enable Windows Fax and Scan Using PowerShell
This is the first and recommended method for installing Windows Fax and Scan.
PowerShell allows you to add optional Windows capabilities directly without navigating through multiple Settings menus.
Follow these steps carefully.
Step 1: Open PowerShell as Administrator
First, you need to open Windows Terminal with administrative privileges.
- Right-click the Windows Start button.
- Select Terminal (Admin).
- If the User Account Control window appears, click Yes.
- Make sure the PowerShell tab is selected.
You can also search for Windows PowerShell using the Start menu and select Run as administrator.
Step 2: Execute the PowerShell Command
Once PowerShell opens, copy and paste the following command:
Add-WindowsCapability -Online -Name "Print.Fax.Scan~~~~0.0.1.0"Press Enter to execute it.
This command instructs Windows to download and install the Windows Fax and Scan capability on your current operating system.
Understanding the command:
Add-WindowsCapabilityis the PowerShell command used to add a Windows capability.-Onlinespecifies that the operation applies to the currently running Windows installation.-Nameidentifies the optional feature you want to install.Print.Fax.Scan~~~~0.0.1.0is the official capability name for Windows Fax and Scan.
Step 3: Wait for the Installation to Complete
After executing the command, Windows will begin installing the required components.
The installation may take a few minutes, depending on your internet connection and Windows servicing configuration.
Once the process finishes, PowerShell should display the installation result.
If the operation completes successfully, you can proceed to the next step.
Step 4: Restart Your Computer
Although a restart is not always required, restarting Windows is a good practice after installing an optional system capability.
Save your work and restart your computer if Windows requests it or if the application does not appear immediately.
Step 5: Verify Windows Fax and Scan
After restarting your computer:
- Press Windows + S to open Search.
- Type Windows Fax and Scan.
- Select the application from the search results.
- Wait for the application to open.
If the application launches successfully, Windows Fax and Scan has been enabled.
You can now connect a compatible scanner and configure it to scan your documents.
Pro Tip: You can also press Windows + R, type wfs, and press Enter to launch Windows Fax and Scan directly.
4. Method 2: Enable Windows Fax and Scan Using Settings
If you do not want to use PowerShell commands, Windows 11 also provides a graphical option to install optional features.
This method is suitable for beginners who prefer using the Windows Settings application.
Follow the steps below.
Step 1: Open Windows Settings
Press Windows + I on your keyboard to open the Settings application.
Alternatively, right-click the Start button and select Settings.
Step 2: Navigate to Optional Features
In the Settings window:
- Select System from the left sidebar.
- Scroll down and click Optional features.
- Find the option to add an optional feature.
- Click View features.
Windows will display a list of optional features available for installation.
Step 3: Search for Windows Fax and Scan
In the search box, type:
Windows Fax and Scan
If the feature appears in the results, select its checkbox.
Click Next to continue.
Step 4: Install the Feature
Review the selected feature and click Install.
Windows will download and install the required components.
Wait until the installation process reaches completion.
The time required depends on your computer and the availability of the installation files.
Step 5: Open Windows Fax and Scan
Once installation is complete:
- Open the Start menu.
- Search for Windows Fax and Scan.
- Click the application.
- Confirm that it opens correctly.
That’s it! You have successfully enabled Windows Fax and Scan through Windows Settings.
Note: The availability and exact placement of optional features can vary between Windows 11 builds and organizational configurations. If Windows Fax and Scan does not appear in the list, use the PowerShell method described earlier.
5. How to Open Windows Fax and Scan
After installing the feature, you can access it in several ways.
Method 1: Using Start Search
- Click Start.
- Type Windows Fax and Scan.
- Select the application.
Method 2: Using the Run Command
- Press Windows + R.
- Type
wfs. - Press Enter.
Windows will attempt to launch the application directly.
Method 3: Using the Start Menu Shortcut
If Windows Fax and Scan appears in your Start menu, you can right-click it and pin it to Start for easier access.
6. Common Errors and Their Fixes
Sometimes Windows Fax and Scan may fail to install or open correctly. Here are some common problems and their possible solutions.
Error 1: Windows Fax and Scan Is Not Appearing in Search
Possible reason: The feature may not have installed successfully, or Windows Search has not refreshed its application results.
Solution:
- Open PowerShell as administrator.
- Run the installation command again.
- Check the installation result.
- Restart your computer.
- Search for Windows Fax and Scan again.
You can also check the capability status using:
Get-WindowsCapability -Online -Name "Print.Fax.Scan~~~~0.0.1.0"Look for the State value. Installed indicates that the capability is present.
Error 2: PowerShell Installation Failed
Possible reason: Windows may be unable to download the required installation package or access its configured servicing source.
Solution:
First, check your internet connection and Windows Update settings.
Then run the following commands from an elevated Terminal:
DISM /Online /Cleanup-Image /RestoreHealthAfter the operation completes, run:
sfc /scannowRestart your computer and try installing Windows Fax and Scan again.
If the issue continues, check your organization’s Windows Update or Features on Demand policies if the device is managed.
Error 3: Windows Fax and Scan Cannot Detect the Scanner
Possible reason: Your scanner may be disconnected, switched off, or missing the correct device driver.
Solution:
- Check that your scanner is powered on.
- Verify its USB or network connection.
- Open Settings.
- Navigate to Bluetooth & devices > Printers & scanners.
- Check whether Windows recognizes your scanner.
- Install the latest compatible driver from your scanner manufacturer’s official website if necessary.
Remember that installing Windows Fax and Scan does not automatically configure scanner hardware.
Error 4: Windows Fax and Scan Opens but Does Not Scan Documents
Possible reason: The scanner driver may be outdated, incompatible, or incorrectly configured.
Solution:
- Disconnect and reconnect your scanner.
- Check the scanner manufacturer’s software.
- Update the device driver.
- Verify that the scanner is selected in the application.
- Restart the scanner and computer.
If you are troubleshooting other Windows application problems, you may also find our guide on how to boot Windows 11 in Safe Mode helpful.
Error 5: Windows Fax and Scan Stops Responding
Possible reason: Windows system files or related components may be damaged.
Solution:
Run the following commands in an elevated Terminal, one at a time:
DISM /Online /Cleanup-Image /RestoreHealthsfc /scannowRestart your PC after both operations finish.
If other Windows applications are also experiencing startup problems, read our troubleshooting guide: Outlook Will Not Open in Windows 11.
You can also check our guide on how to fix Start Menu not working in Windows 11.
7. Best Practices and Pro Tips
After enabling Windows Fax and Scan, follow these recommendations to avoid common scanning and installation problems.
1. Keep Windows Updated
Install available Windows updates to maintain compatibility with system components and connected devices.
2. Use Official Scanner Drivers
Always download scanner drivers from the manufacturer’s official website. Avoid unknown driver-download websites.
3. Choose the Correct Scanning Format
Select an appropriate file format depending on your requirements.
- PDF: Useful for sharing and storing documents when supported by your scanning workflow.
- JPEG: Suitable for photographs and smaller image files.
- TIFF: Useful for certain professional document and image workflows.
Available formats depend on the scanner and its driver.
4. Check Your Scanner Connection
Before starting a scanning task, verify that your scanner is connected properly and recognized by Windows.
5. Keep Important Documents Backed Up
Save scanned documents in an organized folder and maintain backups of important business or personal files.
6. Use a Modern Scanning Alternative When Necessary
If you only need to scan documents and do not require fax functionality, consider the Windows Scan application available through Microsoft Store.
It provides a simpler scanning experience for compatible scanners.
8. Frequently Asked Questions (FAQs)
1. Is Windows Fax and Scan available in Windows 11?
Yes. Windows Fax and Scan is still available for supported Windows 11 installations as an optional Feature on Demand. However, it is not preinstalled by default in newer Windows 11 installations.
2. How do I enable Windows Fax and Scan using PowerShell?
Open Windows Terminal as administrator, select PowerShell, and execute:
Add-WindowsCapability -Online -Name "Print.Fax.Scan~~~~0.0.1.0"Wait for installation to finish and restart your computer if required.
3. Why is Windows Fax and Scan missing from Windows 11?
Microsoft distributes Windows Fax and Scan as an optional Windows capability. Therefore, it may not appear on a fresh Windows 11 installation. You can install it using PowerShell or Windows Optional Features.
4. Can I use Windows Fax and Scan without a scanner?
Yes. You can install and open the application without connecting a scanner. However, you need compatible scanner hardware and the appropriate drivers to scan physical documents.
Similarly, fax functionality requires compatible fax hardware or a supported fax service.
5. What is the PowerShell command to check whether Windows Fax and Scan is installed?
Open PowerShell as administrator and execute:
Get-WindowsCapability -Online -Name "Print.Fax.Scan~~~~0.0.1.0"Check the State value in the output. If it displays Installed, Windows Fax and Scan is already installed on your computer.
9. Conclusion
Windows Fax and Scan is still a useful application for Windows users who regularly scan documents or work with traditional fax systems.
Although Microsoft does not include it by default in newer Windows 11 installations, you can easily install it as an optional feature.
The PowerShell method is a convenient way to install the application using a single command:
Add-WindowsCapability -Online -Name "Print.Fax.Scan~~~~0.0.1.0"Alternatively, you can navigate to Settings > System > Optional features and install it through the graphical interface.
Both methods allow you to restore Windows Fax and Scan without downloading an unofficial installer.
If you encounter installation problems, check your Windows Update configuration, system files, and scanner drivers before trying again.