Windows 10 is a powerful operating system that often comes with a variety of applications that start up when you boot your computer. While some of these are essential for the system to function properly, others might be unnecessary and can slow down your computer. Here’s a simple guide on how to stop these auto-start apps.
Step 1: Open Task Manager
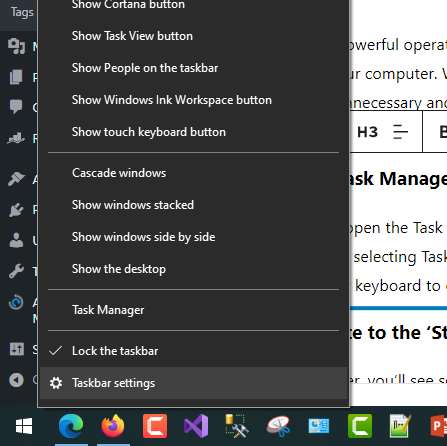
First, you need to open the Task Manager. You can do this by right-clicking on the taskbar at the bottom of your screen and selecting Task Manager from the menu that appears. Alternatively, you can press Ctrl + Shift + Esc on your keyboard to open it.
Step 2: Navigate to the ‘Start-up’ Tab
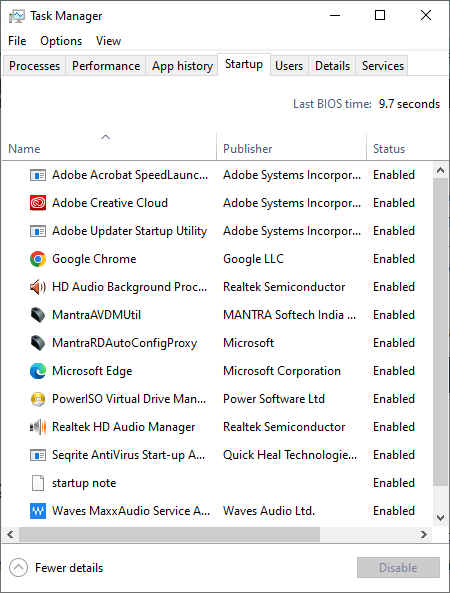
In the Task Manager, you’ll see several tabs at the top of the window. Click on the one that says Start-up. When you open this, you’ll see a list of all the programs that kick in automatically when your computer starts up.
Step 3: Disable Unnecessary Apps
In the Start-up tab, you’ll see the name of each application, its publisher, and the impact it has on your computer’s start-up speed. To stop an application from starting up automatically, simply right-click on it and select Disable.
Note: Be careful not to disable any applications that your system needs to function properly. If you’re unsure about an application, it’s best to leave it enabled.
Step 4: Restart Your Computer
Once you’ve disabled the applications you don’t need, restart your computer. The changes will take effect the next time your computer starts up.
And that’s it! You’ve successfully stopped unnecessary applications from starting up automatically on your Windows 10 computer. This should help your computer start up faster and run more smoothly. Remember, you can always go back to the Task Manager and enable any applications you’ve disabled if you find you need them in the future. Happy computing! 🖥️