Introduction
Welcome to our comprehensive guide on removing Bing from Windows 11. We understand that many users prefer alternative search engines, and we’re here to help you make the switch seamlessly. In this guide, we’ll walk you through the steps to eliminate Bing as your default search engine on Windows 11, ensuring a more tailored and personalized search experience.
Why Remove Bing?
While Bing is a popular search engine, some users may have specific preferences or requirements that lead them to opt for other search engines. Whether it’s the user interface, search result relevance, or simply a matter of personal choice, changing your default search engine is a common customization on Windows 11.
Step-by-Step Guide
1. Open Settings
Begin by opening the Settings on your Windows 11 device. You can do this by clicking on the Start button and selecting the gear icon, or by pressing Windows + I on your keyboard.
2. Navigate to System
Once in the Settings menu, navigate to the System tab. Here, you’ll find various options related to the functioning and customization of your system.
3. Select Default Apps
Within the System tab, locate and select Default Apps. This section allows you to manage the default applications for various functions on your Windows 11 system.
4. Choose Default Web Browser
Under Default Apps, find and click on Web browser. This is where you can set your preferred web browser, which, in turn, determines your default search engine.
5. Change Default Search Engine
Once you’ve accessed the Web browser settings, you’ll see a list of available browsers. Choose your preferred browser and set it as the default. This action automatically changes your default search engine, moving away from Bing.
Additional Tips for a Seamless Experience
1. Clear Browser Cache
After making the change, it’s advisable to clear your browser cache. This ensures that your browser starts afresh with the newly selected default search engine, preventing any residual data from affecting your search results.
2. Explore Browser Extensions
Many browsers offer extensions that further enhance your search experience. Consider exploring extensions that align with your preferences, providing additional features and functionalities.
3. Customize Search Settings
Within your chosen browser, delve into the search settings. This allows you to fine-tune your search preferences, ensuring that the results are tailored to your specific needs.
Conclusion
Congratulations! You’ve successfully removed Bing from Windows 11 and tailored your search experience to better suit your preferences. Remember, these changes are reversible, so feel free to experiment with different search engines until you find the one that meets your expectations.
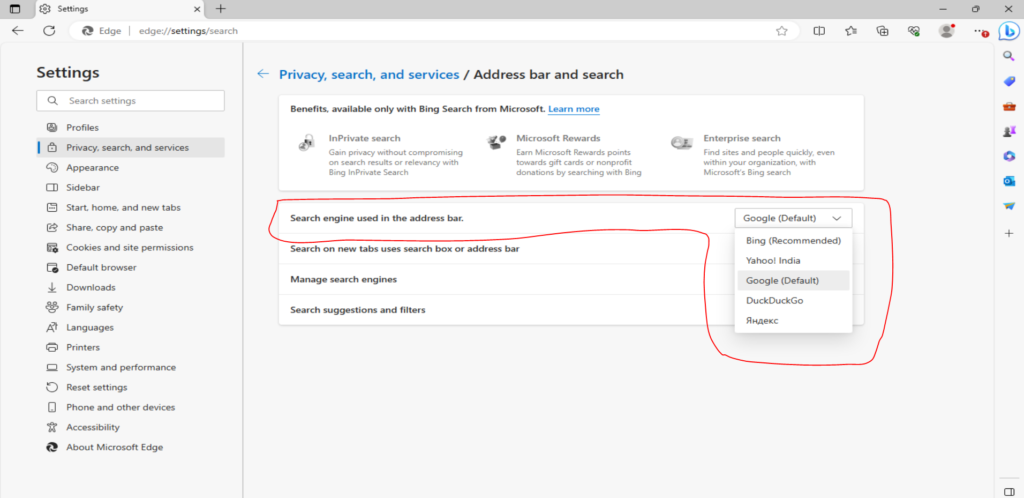
Quick Fix Steps
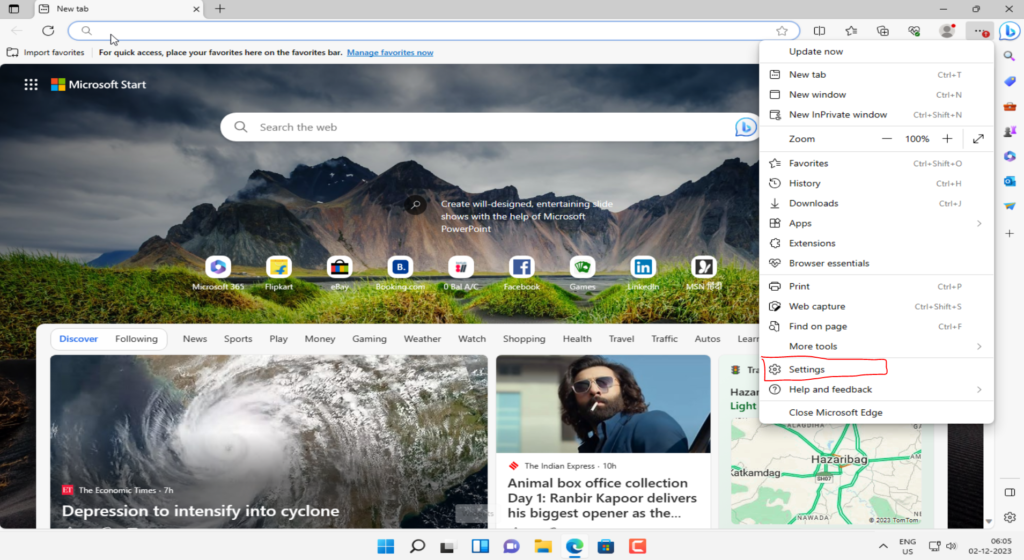
- Open Edge Browser in Windows 11 and go to setting
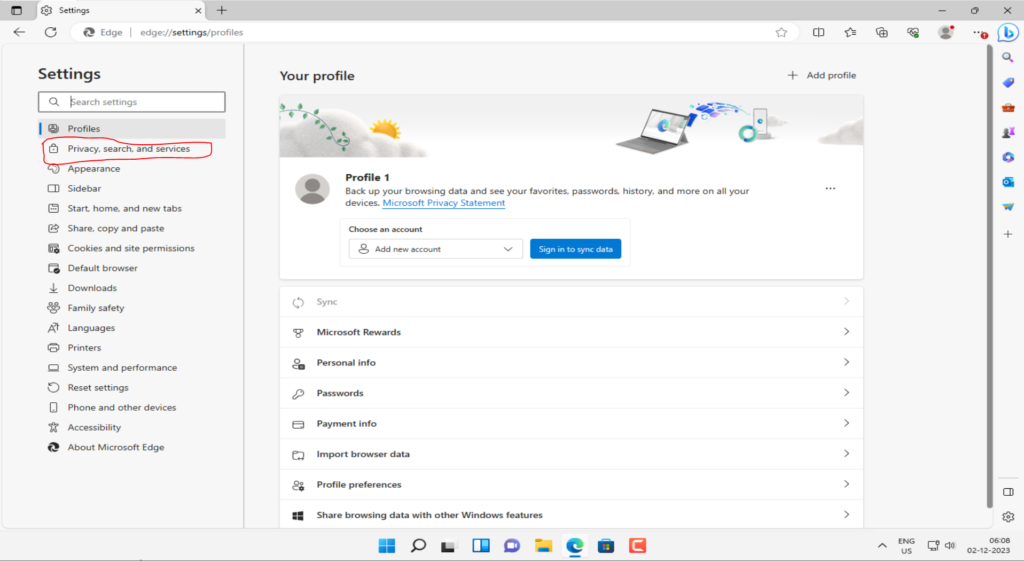
2. Click on “Privacy, Search and services”
3. Scroll down and select ” Address bar and Search “

4. Select Search Engine ” Bing to Google “