
The PAGE_FAULT_IN_NONPAGED_AREA error is a common Windows 11 Blue Screen of Death (BSOD) problem that can cause your computer to restart unexpectedly. You may encounter this error while starting Windows, playing games, installing updates, browsing the internet, or performing everyday tasks.
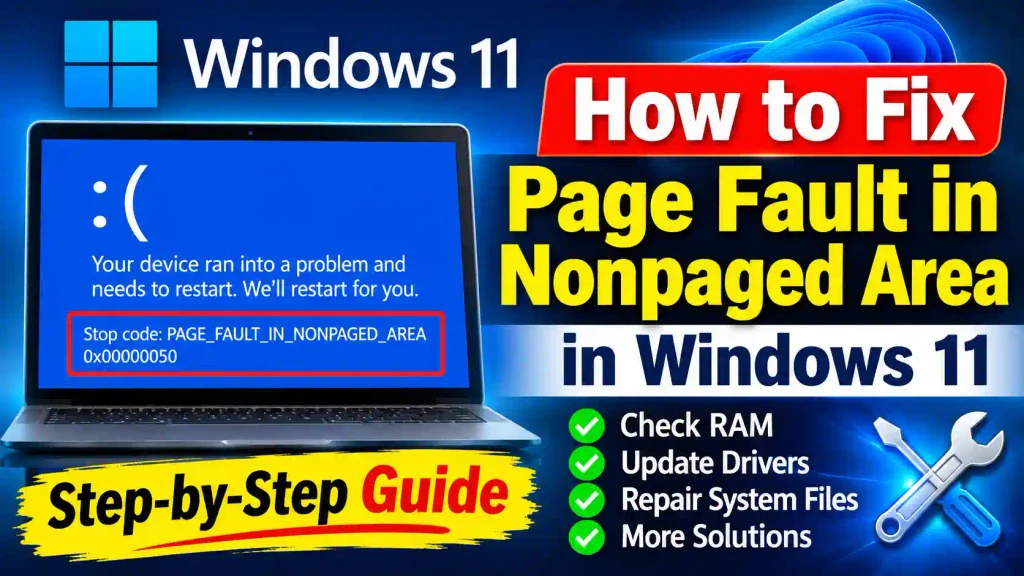
This blue screen error generally indicates that Windows attempted to access a memory address that should have been available but could not be accessed. Common causes include faulty RAM, outdated device drivers, corrupted system files, disk errors, and incompatible software.
The good news is that you can often fix this problem without reinstalling Windows 11. In this guide, we will explain what causes the PAGE_FAULT_IN_NONPAGED_AREA error and walk you through practical solutions to resolve it.
Quick Answer: How to Fix Page Fault in Nonpaged Area in Windows 11
To fix the PAGE_FAULT_IN_NONPAGED_AREA error in Windows 11, restart your computer, disconnect unnecessary external devices, update problematic drivers, check your RAM using Windows Memory Diagnostic, and repair corrupted system files.
You can also run the following commands in Command Prompt (Admin):
1. Run System File Checker:
sfc /scannow2. Repair the Windows image:
DISM /Online /Cleanup-Image /RestoreHealth3. Check your drive for file system errors:
chkdsk C: /scanRestart your computer after completing these steps and check whether the blue screen error appears again.
Table of Contents
- What Is PAGE_FAULT_IN_NONPAGED_AREA?
- Why Does This Error Occur in Windows 11?
- How to Fix Page Fault in Nonpaged Area in Windows 11
- Common Errors and Additional Fixes
- Best Practices to Prevent This Error
- Frequently Asked Questions
1. What Is PAGE_FAULT_IN_NONPAGED_AREA?
PAGE_FAULT_IN_NONPAGED_AREA is a Windows stop code that appears when the operating system cannot access a memory address that should be present in physical memory or otherwise accessible as expected.
Windows uses different types of memory to manage running applications, drivers, and system processes.
The nonpaged area is a portion of system memory that must remain available in physical RAM. It cannot be moved to the paging file when Windows needs it.
When a kernel-mode component attempts to access an invalid or unavailable memory address, Windows may stop operating and display a blue screen to protect the system.
You may see the following message:
Stop Code: PAGE_FAULT_IN_NONPAGED_AREA
The error may also display the code 0x00000050.
Sometimes, Windows identifies a related driver or system file on the blue screen. This information can help narrow down the cause.
2. Why Does This Error Occur in Windows 11?
Before applying a solution, it is helpful to understand the possible causes.
Here are some common reasons:
- Faulty RAM: Damaged or unstable memory modules can cause Windows memory access errors.
- Outdated drivers: Incompatible graphics, network, storage, or other device drivers may trigger BSOD errors.
- Corrupted system files: Damaged Windows files can interfere with normal operating system functions.
- Disk problems: File system errors or a failing SSD or HDD may contribute to system instability.
- Third-party antivirus: Certain security applications can conflict with Windows or device drivers.
- Recently installed software: Incompatible applications or system utilities may cause memory-related problems.
- Overclocking: Unstable CPU or RAM settings can result in unexpected system crashes.
Identifying the cause can save time because you may not need to perform every troubleshooting method.
3. How to Fix Page Fault in Nonpaged Area in Windows 11
Follow these solutions in order. Start with the simpler methods before moving to advanced troubleshooting.
Method 1: Restart Your Computer and Disconnect External Devices
Sometimes, a temporary driver or hardware communication problem can trigger a blue screen.
First, restart your Windows 11 computer.
If the error appears repeatedly, disconnect unnecessary external devices, including:
- USB flash drives
- External hard drives
- Printers
- USB hubs
- External webcams
- Other recently connected accessories
Keep your keyboard, mouse, and essential devices connected.
Restart your computer and check whether Windows operates normally.
If the error disappears, reconnect your devices one at a time to identify the problematic hardware.
Method 2: Start Windows 11 in Safe Mode
Safe Mode starts Windows with a limited set of drivers and services. It can help determine whether a third-party driver or application is responsible.
Follow these steps:
- Press Windows + I to open Settings.
- Select System and click Recovery.
- Under Recovery options, find Advanced startup.
- Click Restart now.
- Select Troubleshoot.
- Choose Advanced options.
- Select Startup Settings.
- Click Restart.
- Press 4 or F4 to enable Safe Mode.
Once Windows starts in Safe Mode, check whether the blue screen error continues.
If the problem does not occur in Safe Mode, an incompatible driver, application, or third-party service may be responsible.
Uninstall recently installed applications or troubleshoot recently updated drivers.
Note: If you cannot access Windows normally, interrupt the startup process using the recovery environment or boot from Windows installation media to access Windows Recovery Environment.
Method 3: Update or Roll Back Device Drivers
Outdated or incompatible device drivers are among the possible causes of PAGE_FAULT_IN_NONPAGED_AREA.
Updating the problematic driver may resolve the issue.
Follow these steps:
- Press Windows + X.
- Select Device Manager.
- Expand categories such as Display adapters, Network adapters, and Storage controllers.
- Right-click the device you suspect is causing the problem.
- Select Properties.
- Open the Driver tab.
- Click Update Driver.
- Select Search automatically for drivers.
If the error started immediately after a driver update, try rolling back the driver.
- Open Device Manager.
- Right-click the recently updated device.
- Select Properties.
- Open the Driver tab.
- Click Roll Back Driver, if available.
- Follow the instructions.
Restart your computer after making the changes.
For better compatibility, download drivers directly from your computer manufacturer’s official support website.
Method 4: Run Windows Memory Diagnostic
Faulty RAM is another possible reason for the PAGE_FAULT_IN_NONPAGED_AREA blue screen.
Windows 11 includes a built-in utility called Windows Memory Diagnostic that checks your computer’s memory for problems.
Here’s how to use it:
- Press Windows + R.
- Type
mdsched.exe. - Press Enter.
- Select Restart now and check for problems (recommended).
- Your computer will restart automatically.
- Windows will perform a memory test.
Wait until the diagnostic process finishes.
After Windows restarts, check the memory diagnostic results. You can also find them in Event Viewer under Windows Logs > System by searching for the MemoryDiagnostics-Results event.
If the test reports memory errors, consider testing individual RAM modules or contacting a qualified technician.
Do not ignore repeated memory errors because defective RAM can cause additional system instability.
Method 5: Repair Corrupted Windows System Files
Corrupted or missing system files can cause unexpected Windows crashes.
You can use System File Checker (SFC) and Deployment Image Servicing and Management (DISM) to repair Windows components.
Step 1: Run SFC
- Right-click the Start button.
- Select Terminal (Admin).
- Approve the User Account Control prompt.
- Enter the following command:
sfc /scannow- Press Enter and wait for the scan to finish.
SFC checks protected Windows system files and attempts to repair corrupted files.
Step 2: Run DISM
If Windows component files are damaged, run the following command:
DISM /Online /Cleanup-Image /RestoreHealthPress Enter and allow the operation to complete.
This command repairs the Windows component store, which can help SFC repair system files successfully.
Restart your computer after both operations finish.
Method 6: Check Your Hard Drive or SSD for Errors
Storage-related problems can sometimes contribute to Windows crashes.
You can use the built-in CHKDSK utility to scan your system drive.
Follow these steps:
- Open Terminal (Admin).
- Enter the following command:
chkdsk C: /scan- Press Enter.
- Wait for the scan to complete.
This command checks the C: drive for file system errors without requiring an offline repair.
If CHKDSK reports errors that require repair, back up important files and consider running an appropriate repair command.
For example:
chkdsk C: /fWindows may ask you to schedule the check for the next restart.
Important: If your SSD or HDD shows signs of physical failure, prioritize backing up your data. CHKDSK cannot repair failing hardware.
Method 7: Uninstall Recently Installed Software
If the blue screen started after installing a new application, security tool, or system utility, that software may be causing a conflict.
To uninstall a recently installed application:
- Press Windows + I.
- Open Apps.
- Select Installed apps.
- Find the recently installed application.
- Click the three-dot menu.
- Select Uninstall.
- Follow the on-screen instructions.
Restart your computer and check whether the problem is resolved.
If you suspect a third-party antivirus application, use its official uninstaller when necessary. Make sure Windows Security is active afterward.
Method 8: Install Windows 11 Updates
Microsoft regularly releases Windows updates that include security improvements, bug fixes, and compatibility updates.
Installing available updates may resolve problems associated with system components and drivers.
Follow these steps:
- Press Windows + I.
- Select Windows Update.
- Click Check for updates.
- Install available updates.
- Restart your computer if required.
Also check Optional updates for relevant driver updates, but avoid installing an older or incompatible driver simply because it is available.
If the blue screen started immediately after a particular Windows update, consider uninstalling that update through Windows Recovery Environment or Update history, after checking for known issues.
Method 9: Reset Virtual Memory Settings
Windows uses a paging file to manage virtual memory. Incorrectly configured paging file settings can contribute to memory-related problems in some situations.
You can restore the default automatic management setting.
- Press Windows + R.
- Type
sysdm.cpland press Enter. - Open the Advanced tab.
- Under Performance, click Settings.
- Select the Advanced tab.
- Under Virtual memory, click Change.
- Check Automatically manage paging file size for all drives.
- Click OK on each open window.
- Restart your computer.
Pro Tip: Do not disable the paging file as a troubleshooting shortcut. Windows applications and crash-dump generation may depend on it.
Method 10: Use System Restore
If none of the previous solutions works, System Restore may help return Windows to an earlier working state.
This option is especially useful when the problem started after installing a driver, application, or system update.
Follow these steps:
- Press Windows + R.
- Type
rstrui.exe. - Press Enter.
- Click Next.
- Select a restore point created before the problem started.
- Click Next.
- Review the details and click Finish.
Wait until Windows completes the restoration process.
System Restore can remove applications, drivers, and system changes made after the selected restore point. It is not a replacement for backing up personal files.
4. Common Errors and Additional Fixes
Here are some additional situations you may encounter while troubleshooting this blue screen.
| Problem | Recommended Fix |
|---|---|
| Blue screen appears during startup | Use Windows Recovery Environment and try Safe Mode or Startup Repair. |
| Error appears after a driver update | Roll back the problematic driver. |
| Windows crashes during gaming | Check RAM stability, graphics drivers, and GPU temperatures. |
| Error appears after installing antivirus | Uninstall the security application and test Windows Security. |
| Memory Diagnostic reports errors | Test RAM modules individually or replace defective memory. |
| Error continues after SFC and DISM | Check storage health, drivers, and crash dump files. |
| Computer crashes after overclocking | Restore default BIOS/UEFI CPU and RAM settings. |
If the error continues, check the Windows crash dump files located in:
C:\Windows\Minidump
These files may help identify the driver or kernel component involved in the crash. IT professionals can analyze them using Windows debugging tools such as WinDbg.
5. Best Practices to Prevent PAGE_FAULT_IN_NONPAGED_AREA
After resolving the blue screen error, follow these practices to reduce the chances of experiencing it again.
- Keep Windows 11 updated with supported security and quality updates.
- Install device drivers from official manufacturer websites.
- Avoid downloading drivers from unknown third-party websites.
- Do not overclock your RAM or CPU unless you understand the stability risks.
- Monitor your SSD and HDD health.
- Keep sufficient free storage space on your Windows drive.
- Use reputable antivirus software.
- Remove applications you no longer need.
- Back up important documents regularly.
- Investigate recurring blue screens instead of repeatedly restarting the computer.
If your computer continues crashing despite software troubleshooting, consider professional hardware testing.
Conclusion
The PAGE_FAULT_IN_NONPAGED_AREA error in Windows 11 can be frustrating, especially when it causes repeated blue screens or unexpected restarts.
However, you can often resolve it by identifying the underlying problem.
Start by disconnecting unnecessary devices, checking recently installed drivers, and running Windows Memory Diagnostic. Then use SFC, DISM, and CHKDSK to investigate possible system file and storage issues.
If the problem continues, check your RAM, review crash dump files, and consider professional hardware diagnostics.
Following the troubleshooting methods in this guide can help restore Windows stability without immediately reinstalling the operating system.
Frequently Asked Questions (FAQs)
1. What causes PAGE_FAULT_IN_NONPAGED_AREA in Windows 11?
This error can be caused by faulty RAM, incompatible device drivers, corrupted Windows system files, storage problems, or conflicting third-party applications. Identifying when the error first appeared can help narrow down the cause.
2. How do I fix PAGE_FAULT_IN_NONPAGED_AREA without reinstalling Windows?
You can try updating or rolling back drivers, running Windows Memory Diagnostic, repairing system files with SFC and DISM, checking your drive with CHKDSK, and uninstalling recently installed software.
3. Is PAGE_FAULT_IN_NONPAGED_AREA caused by bad RAM?
Yes, defective or unstable RAM can trigger this error. However, it is not the only possible cause. Incompatible drivers, corrupted system files, and other hardware problems can also produce this blue screen.
4. What is the error code for PAGE_FAULT_IN_NONPAGED_AREA?
The Windows stop code associated with PAGE_FAULT_IN_NONPAGED_AREA is 0x00000050. It indicates an invalid memory access condition that caused Windows to stop operating.
5. Can I prevent PAGE_FAULT_IN_NONPAGED_AREA errors?
You can reduce the chances of this error by maintaining updated drivers, installing Windows updates, checking RAM and storage health, avoiding unstable overclocking, and removing incompatible software.